
Every phone comes with its own gallery application to hold data. However& these applications are nothing good in front of the very Google Photos& which is& by far& the most acknowledged gallery application available for users. Its synchronization property saves all the media files over the cloud& and the cross-platform support is the highlight of the application that makes it the best in the business. This article puts up the question of merging different Google Photos accounts together. With all the photos and videos merged into a single account& you can have all your data controlled from a single platform while suspending the connection from the others. This article discusses the method for merging Google Photo accounts that can be controlled from a single account.
Table of Contents
Part 1: Share Google Photos Library
After having yourself tagged away and signed in into the Google Photos library& the task is to lead through the menu and have the library shared for merging it with the other account. This shall require you to follow a series of steps which are as stated:
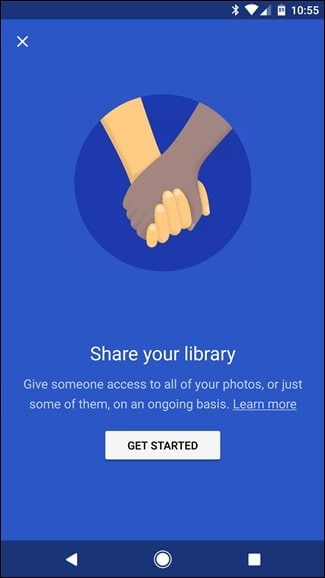
Step 1: Access your library to be shared
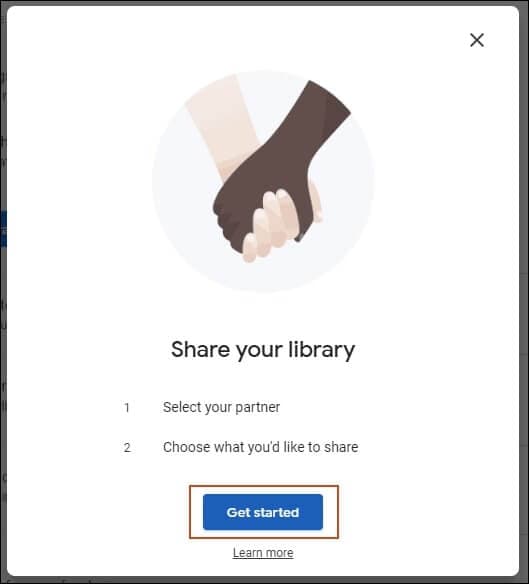
After opening and signing into Photos& slide to the left of the screen to open a different menu displaying the option of Share your Library. This is the initiation of having your data shared. Tap onto “Get Started” for starting the process.
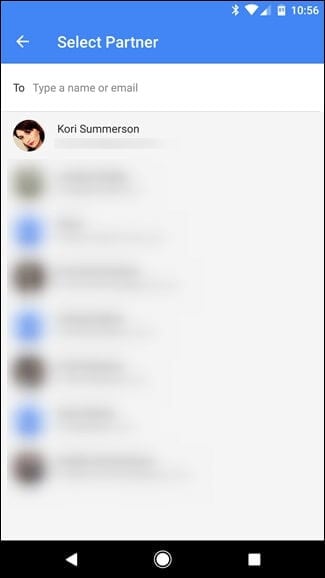
Step 2: Pick out with whom and what you want to Share
You are to select another person having a Google Photos account in the first place. It will be followed by another menu& referring to the data and the intensity that is to be shared with the other individual or account. You can select any option ranging from All Photos to Photos of Specific People& where you have to pick the photos yourselves for sharing it. Furthermore& the user is also provided with the autonomy to select the option showing Only show Photos since this day& which restricts the display options by providing you with the option of selecting a custom start date.
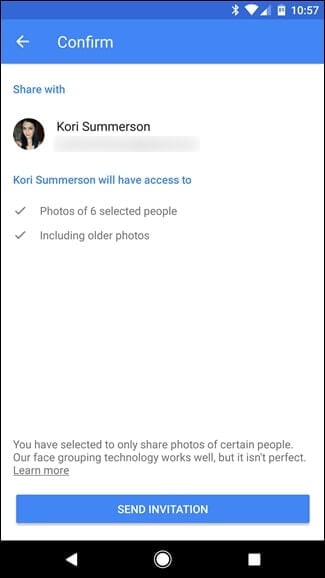
Step 3: Verification of the process
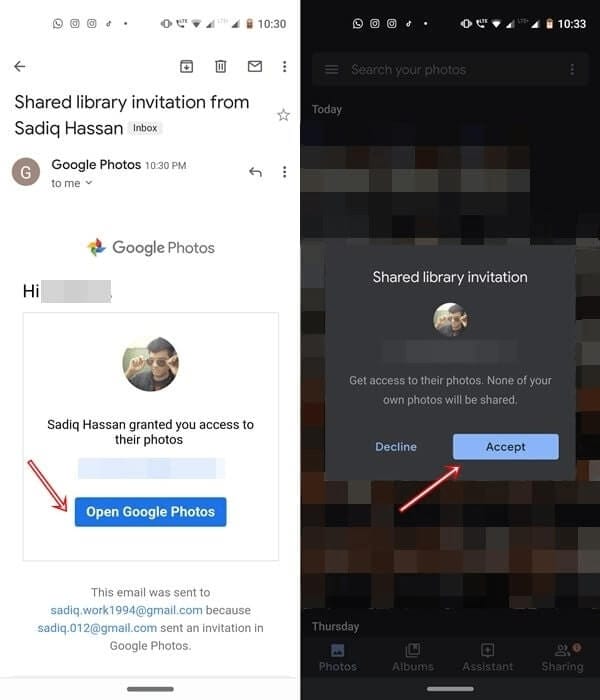
The process of linking Google Accounts is completed by verifying the process that comes in the form of a prompt message.
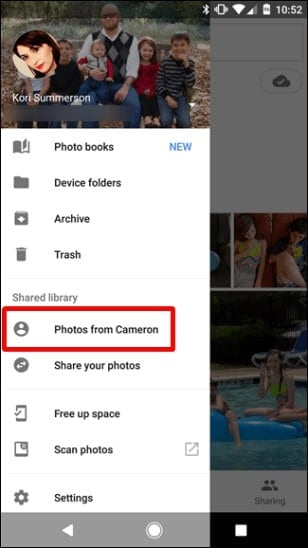
Observing the Situation from the Other side
Step 1: Accessing the Library
While having the library shared from a primary account& the situation that can be observed from the secondary account is a different perspective to the story. You can observe a button displaying the library shared by the primary account from the pop-up menu that appears on the Photos’ menu.
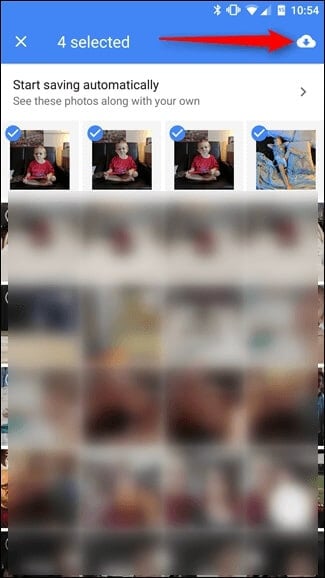
Step 2: Importing the Library
After opening the library& it is up to the user to select the photos that they want to have imported into their personal library. After selecting the photos& you need to simply tap the button depicting a cloud on the screen's top-right corner.
Part 2: Merge Photo Library
Merging Google Photos is possible for both the browser and the smartphones. The article seeks to present a proper step-by-step guide to allow people to understand the procedure involving merging Google Accounts and their associated libraries. The merging process initially requires two Google Photo Accounts& where one acts as the primary batch& and the other with be its merged associate.
Merging Google Accounts on Android
Step 1: Login with the Primary Account
You are required to log in with the 'primary' account from where you seek to operate the complete library eventually.
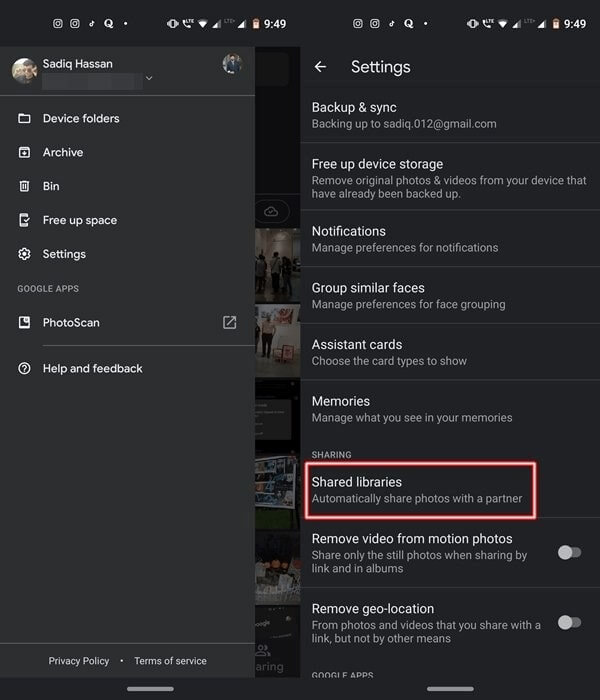
Step 2: Approach the Sharing options from Settings
With the account signed in& you must approach the 'Sharing' option from the sliding menu& followed by selecting the 'Shared Libraries' button& which is referred for sharing photos with other accounts.
Step 3: Select your Partner
With a new screen on the front& select an account that shall act as the secondary in the process.
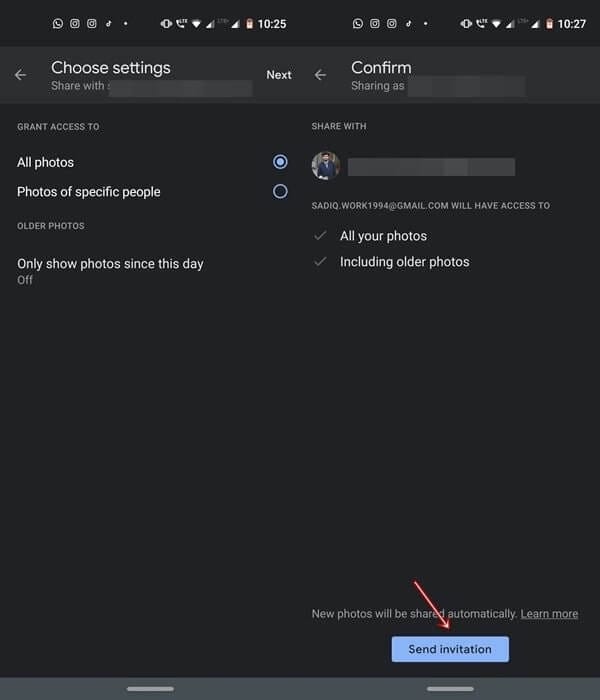
Step 4: Select the Library and Grant Access
Following the account's selection& you are to provide access to the account over a certain portion of the photo library& which is selected accordingly. After having it selected& a confirmation screen opens up. With the confirmation screen& you are required to tap on the option of Send Invitation.
Step 5: Receiving of the invitation over the other account
The merger concludes with the other account accepting the invitation of the primary account to have access to the photo libraries.
Merging Google Accounts on Web Browser
The procedure that is to be followed while using a web browser is considerably similar to what has been done in the Android device. Apart from a few different protocols in the web browser& the overall process of merging two Google Photo Accounts is identical.
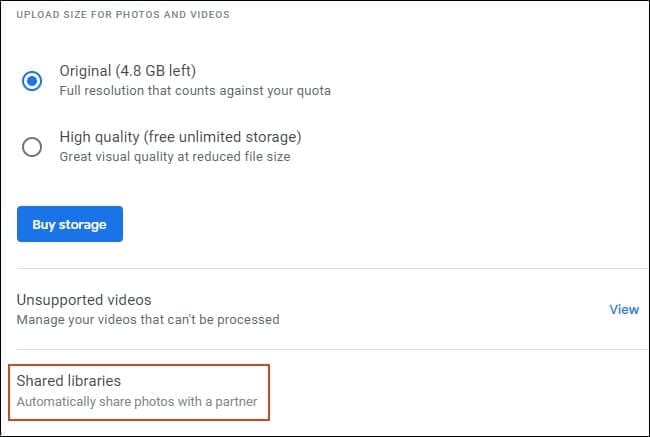
Step 1: Access the Settings for Sharing the Library
Sign-in into the primary account and access the account's settings from the top-left menu on the screen. Move into the Settings from the drop-down menu and select the option of Shared Libraries& which initiates the process of sharing and merging libraries.
Step 2: Select the partner and confirm
The process of selecting the other account& followed by the confirmation& is almost similar to what has been discussed before. After accepting the invitation sent by the primary account& the initial merging has been performed& and the accounts are merged accordingly.
Step 3: Sharing Back
The process that involves merging libraries can go both ways& in both the web browser and the mobile application. You are provided an option of sharing back the libraries in the merged account with the primary account. In simpler words& the user can share the data in both directions. After selecting the option showing Share Back& you need to follow the same drill of sharing and confirming the account.

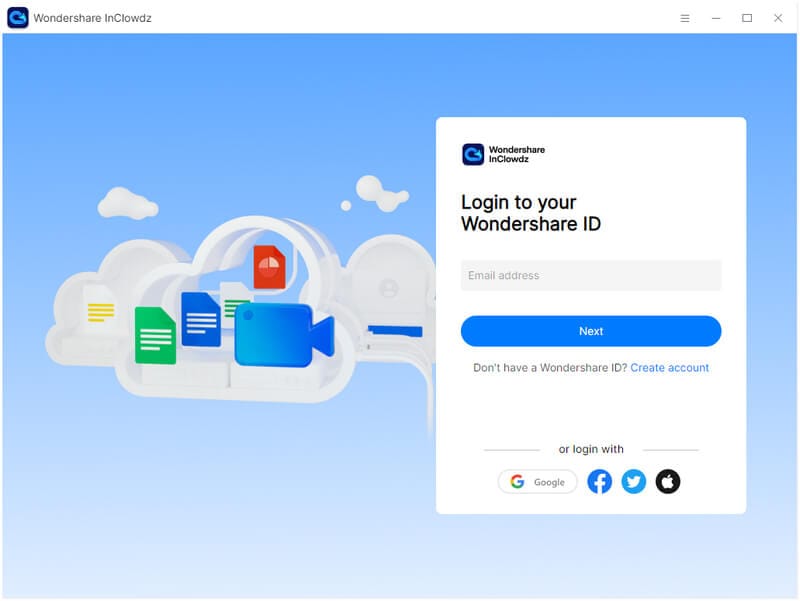
Merging Google Photos by using InClowdz
You can sync tow Google Photos accounts by using Wondershare InClowdz.
Migrate, Sync, Manage Clouds Files in One Place
- • Migrate cloud files such as photos, music, documents from one drive to another, like Dropbox to Google Drive.
- • Backup your music, photos, videos in one could drive to another to keep files safe.
- • Manage all cloud drives such as Google Drive, Dropbox, OneDrive, box, and Amazon S3 in one place.
- • Sync clouds files such as music, photos, videos, etc., from one cloud drive to another.
Step 1 - Download and install the Wondershare InClowdz on your device.
Step 2 - Create an account and then login.
Step 3 - Then go to the ‘Sync’ option given on the left side of your screen.
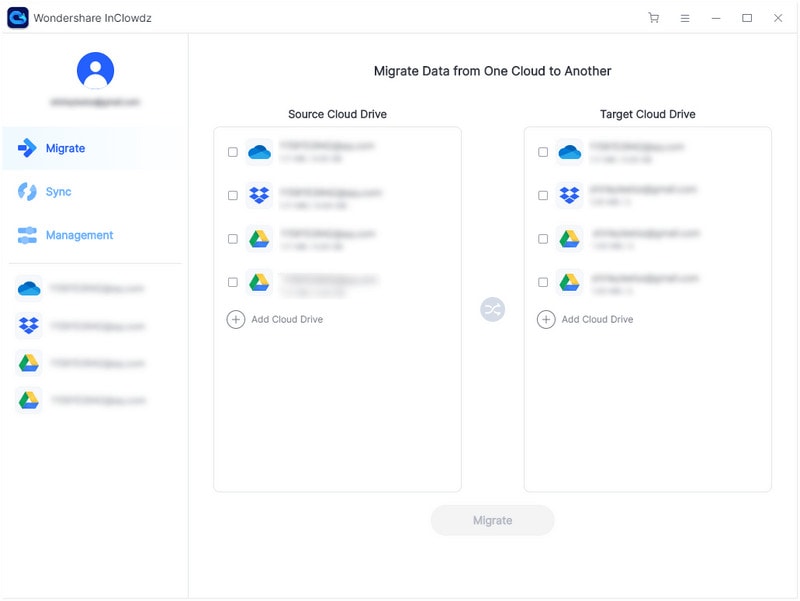
Step 4 - Further& choose the ‘Add Cloud Drive’ option for adding two Google Photos to your InClowdz account.
Conclusion
This article states a complete guideline for the user to utilize Google Photos along with a detailed step-by-step guide on how to merge Google Photos accounts while selecting the proper options concerning the merging mechanism.

 100% Secure