Google Photos is one of the most popular backup apps for photos and videos. One of the advantages of this app is that you can use it on several platforms. But there is always the question of restoring Google Photos.
Have you ever deleted some photos from Google Photos permanently and wished you could get them back? This situation must have led you to seek how to restore photos from Google Photos. You are not alone in this& and that is why we put this post together. We will show you how to recover deleted photos from Google Photos on a computer& iOS& and Android.
Table of Contents
- Part 1: Can I Recover Permanently Deleted Photos from Google Photos?
- Part 2: How to restore photos from Google Photos on Computer
- Part 3: How to restore photos from Google Photos on Android/iOS
- Part 4: How to recover deleted photos from Google Photos after 60 days
- Part 5: Use InClowdz to Manage Google Photos
Part 1: Can I Recover Permanently Deleted Photos from Google Photos?
This is a very common question among individuals that make use of Google Photos. The answer to this question is& “Yes.” Usually& when you delete photos permanently from Google Photos& they become invisible. So why do we think that you can recover them?
Let’s show you a few reasons why we know that you can:
- Normally& after deleting a photo from Google Photos& it moves to the Trash folder. The contents of this folder remain there for 60 days before they are deleted permanently. So& if you have deleted photos from Google Photos& you can always visit the Trash folder to restore them.
- You can recover these photos because your photos on Android devices are never completely deleted. All you need to locate and restore these photos is a recovery tool.
By now& you must be wondering& what if you cannot find the photos on your Android and it is past 60 days? Can you recover these photos? Again& the answer is& “Yes.” There are two ways of doing this. Check them out below:
- Reach out to Google Support. If you do& they can help you to recover the photos. What if you can’t reach them?
- Make use of photo recovery software. Such software will help you retrieve your photos even if you have crossed the 60-day mark.
We believe that you are already looking forward to learning how to recover permanently deleted files from Google Photos. Check the next section to learn how to.
Part 2: How to restore photos from Google Photos on Computer
The first method we will discuss is restoring Google Photos via a computer. Almost everyone owns a computer these days. If you have deleted photos from Google Photos& retrieving them via your PC isn’t so difficult.
All you need to do is to restore the photos from the trash folder. Let’s show you how through the steps below:
Step 1 – Open your favorite browser and type photos.google.com in the address bar.
Step 2 – Click on “menu (the 3 horizontal lines at the top-left corner).”
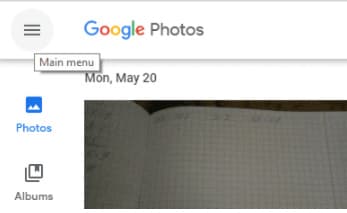
Step 3 – Click on Trash from the list of drop-down options.
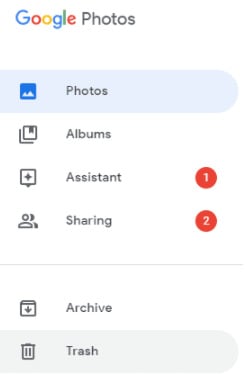
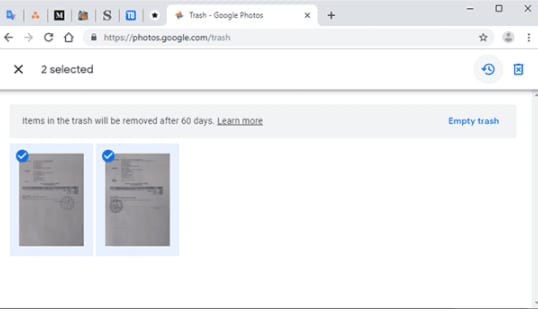
Step 4 – When the Trash folder opens& you should see all the photos that you deleted. Remember that they are photos that have been deleted at most 60 days before now. Select all the photos that you need to restore.
Step 5 – When you are done selecting your photos& click on “Restore.” This button is represented by a “rounded arrow” icon at the top-right of the window. Once you click on this button& the photos return to the original folder they were before deletion.
Part 3: How to restore photos from Google Photos on Android/iOS
The two most popular operating systems for smartphones today are Android and iOS. In fact& some people have both Android and iOS devices. As we stated earlier& Google Photos is compatible with both operating systems.
This brings us to the question& “how do you restore deleted Google Photos on a smartphone?” Since Android and iOS are the most common operating systems for mobile devices& we will discuss both.
On Android
Restoring Google Photos that have been deleted on Android is a piece of cake. You can check the procedure below:
Step 1 – From your home screen& open Google Photos. Tap on the icon to open the app.
Step 2 – When the app launches& go to the top-left section of the app window and tap on “menu.” This will provide you with a list of options. From these options& select “Trash.”
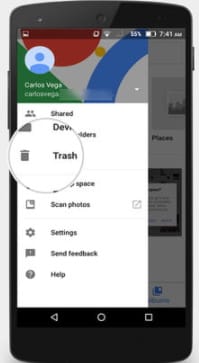
Step 3 – Check the folder for all the photos that you need to restore and select them.
Step 4 – Tap the “restore” button after selecting all the photos& and they should return to their original folders.
See how simple this is? What if you are using an iOS device? Check the next section to find out how to recover your photos.
On iOS
Google Photos on iOS isn’t so different from what it is on Android& even though there are a few differences. What this means is that the process of recovering photos is almost the same. We will show you how to restore Google Photos on iOS in the steps below:
Step 1 – From your home screen& open Google Photos.
Step 2 – Look at the top-left section of the app window and tap on the menu option.
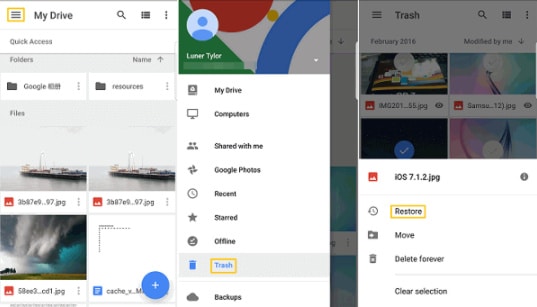
Step 3 – After tapping on the “menu&” you should see a list of options& including “trash.” Tap on trash to open the folder.
Step 4 – Select all the photos that you need to restore. You can do this by tapping on one of the photos and holding it. Once it selects& you can begin to tap all the other photos that you need.
Step 5 – After making your selection& look to the base of the screen and tap on “restore.” This will automatically restore all these photos to their original folders in the app. As you can see& this is also very simple. What if the photos have exceeded 60 days in the trash folder? Check the next section to see what to do.
Part 4: How to recover deleted photos from Google Photos after 60 days
So far& we have discussed restoring Google Photos when the photos have been in the trash folder for less than 60 days. As we told you earlier& when files stay in the trash folder for over 60 days& Google deletes them permanently. The question is this& “can I recover permanently deleted photos from Google Photos?”
Here is a simple and straightforward answer to that question& “Yes& you can” There is a way of doing this& and we will discuss each of them in this section.
Google Support
Once your photos have exceeded 60 days in the trash folder& you have to reach out to Google Support to restore them. This is because they are permanently deleted from the trash folder based on Google’s new policy. Even though they have been deleted& Google still maintains custody of the photos.
As such& you can still access these photos after permanent deletion for another 21 days. All you need to do is reach out to Google’s Support Team to submit a request. Your request must bear a genuine reason; else& it will be declined. Check the steps below to see how you can reach out to Google Support to request your deleted photos:
Step 1 – Open Google Drive and go to the Help Page. Check the list of options available and click on “Missing or deleted files.”
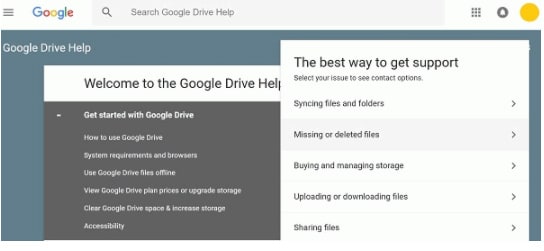
Step 2 – You should see two options in a pop-up dialog box. The first option is “request chat” while the second is “email support.” You can pick the one that suits your preferences.
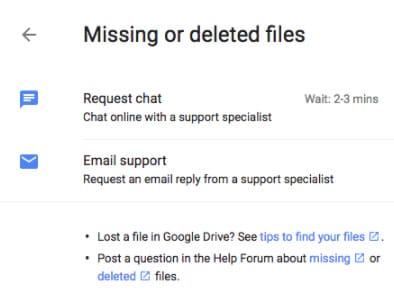
Step 3 – State the reason why you need Google to restore the photos clearly. As we stated above& if you have genuine reasons& the photos will be restored.
If you find this process difficult and long& then you can try out the second method. It is less stressful and time-consuming.
Part 5: Use InClowdz to Manage Google Photos
Here we introduce you to an all-in-one cloud management app – Wondershare InClowdz. You can easily upload& download and manage files and folders in Google Photos using Wondershare InClowdz. It provides you an option to transfer photos from various other cloud Drives to Google Photos.
Migrate, Sync, Manage Clouds Files in One Place
- • Migrate cloud files such as photos, music, documents from one drive to another, like Dropbox to Google Drive.
- • Backup your music, photos, videos in one could drive to another to keep files safe.
- • Manage all cloud drives such as Google Drive, Dropbox, OneDrive, box, and Amazon S3 in one place.
- • Sync clouds files such as music, photos, videos, etc., from one cloud drive to another.
Step 1: Install Wondershare InClowdz
Install Wondershare InClowdz on your PC and create a new account& then log in to it.
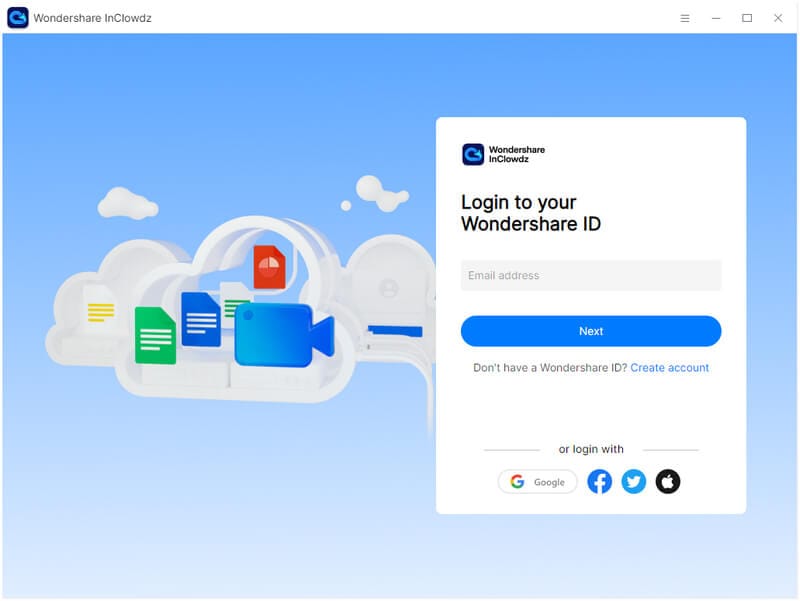
Step 2: Add Google Photo
Click “Management” from the menu and click “Add” to add Google Photos.
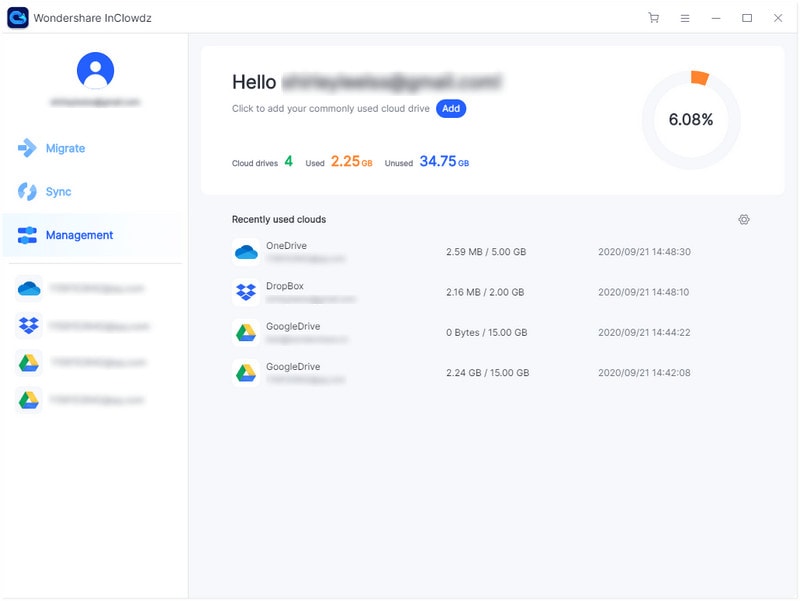
You will be asked for Authorization. Grant permission by clicking on the “Authorize Now” button.
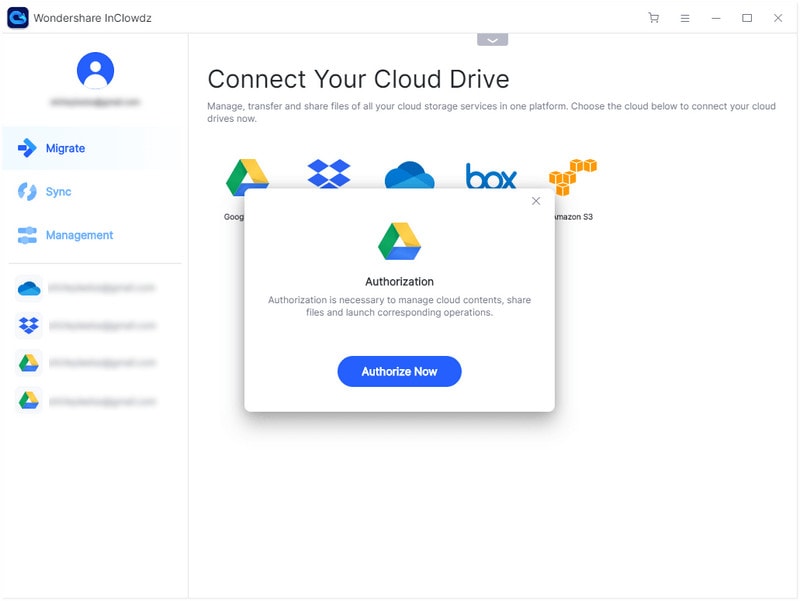
Step 3: Manage the Photos
Click on Google Photos& and then you can view& download& upload and manage the Photos.


 100% Secure