Google Drive is an amazing resource. Using it as a cloud storage platform is undermining the abilities of this resource. One of the advantages of using Google Drive is that it allows you to upload all kinds of files. As such& you can store documents& music& zip folders& videos& and photos on Google Drive.
Photos may take a lot of space on your drive. Since you have just 15GB free storage& you might need to delete photos from Google Drive sometimes. This will come in handy when you need extra space to store documents or other important files.
In this post& we will show you how to delete photos from Google Drive on different devices. First& we need to answer the question& is it safe to delete photos from your Google Drive?
Table of Contents
- Part 1: Is it safe to delete photos from Google Drive?
- Part 2: How to delete photos from Google Drive on Phone
- Part 3: How to delete photos from Google Drive on Computer
- Part 4: How to delete photos from Google Drive with Wondershare InClowdz
- Part 5: How do I permanently delete photos from Google Drive
Part 1: Is it safe to delete photos from Google Drive?
This is a very important question that we must answer before learning how to delete photos from Google Drive. Before now& Google Photos was linked to Google Drive. As a result& you could browse through your photos in Google Drive by clicking on Google Photos.
If you had the Backup and Sync app on your PC& then you could also sync the images to your PC. As interesting as this sounds& there was a challenge. Deleting photos from Google Drive wasn’t safe. Why?
Once you hit the delete button and the photo leaves your Google Drive& it disappears in Google Photos. The same happens when you delete a photo from Google Photos& it disappears from Google Drive. This meant that you could no longer access the photos from any location. It was gone forever.
Google had to make changes to meet up with the demands of its customers. The company removed the connection between Google Photos and Google Drive in July 2019. Because of this& when you add new photos to Google Photos& it doesn’t appear in Google Drive. You have to add the photo to Google Drive directly.
The benefit of this is that when you need to delete any photos from Google Drive& you don’t lose them forever. Instead& you still have access to the photos in other locations. With this& we can say that it is safe to delete photos from Google Drive.
Part 2: How to delete photos from Google Drive on Phone
Google has made it possible to link Photos to Drive on Phone. While setting up the connection is easy& deleting photos because a little more complicated. Because of the sync function& Google deletes photos from both locations when you delete from any of the locations. However& there is a way to delete your photos from Google Drive that will remain in Google Photos.
If you upload a photo to Google Drive& it remains here except you sync it to Google Photos. To delete photos that have been synced& you must first add them to an album in Google Photos. When you do& Google recognizes it as one of the images in Photos. This way& you can delete it from Google Drive easily without losing the photo altogether.
We have split the process into steps to make it easy to understand:
Step 1 – Launch Google Photos on your phone and tap on the synced photo.
Step 2 – Tap the More button at the top-right (3-dot icon). After this& tap on Add to Album.

Step 3 – Tap New Album to create a separate album. On the other hand& you can add the photo to a pre-existing album.

Step 4 – Go to the Albums tab to access the album where you stored the photo.

Now& you can go to your Google Drive to delete the photo. This way& the photo will only get deleted in Google Drive& it remains in Google Photos. The process is simple:
Step 1 – Open Google Drive on your phone.
Step 2 – Tap on the photo you need to delete and select Remove from the list of options available.

Step 3 – The photo moves to the trash folder. If you want to delete the photo permanently& open the trash folder. Tap the photo and select Delete Forever.

Congratulations! Now you know how to delete photos from Google Drive from a phone. Let’s show you how to do it on your computer.
Part 3: How to delete photos from Google Drive on Computer
Deleting photos from Google Drive on your computer is a whole different ball game. Like we said above& Google has removed the link between Google Drive and Google Photos. If you delete a photo from your Google Drive& it doesn’t affect it in your Google Photos account. The only way it does is if you synced both.
We will look at deleting photos from Google Drive on your computer considering that it is not synced. In this case& the process is very similar to how you delete files on Google Drive. All you need to do is to select the photo in Google Drive. After this& you can delete the photo. It will move to the trash folder.
Does this seem too complicated? We have made it simpler to understand with the following steps:
Step 1 – Open Google Drive in your favorite web browser on your PC. If you are not already logged in& provide your login details& and press Enter.
Step 2 – On your Google Drive homepage& go to the photo that you want to delete. Click on the photo you want to delete. Look to the top of the page to see the Trash icon.

Step 3 – Click on the Trash icon to remove the photo from your Google Drive. From it goes to the Trash folder automatically.
If you want to restore the photo to your Drive& it is possible. Take the following steps:
Step 1 – Open the Trash folder from the left pane of the Google Drive window.

Step 2 – Right-click on the photo and click on Restore. When you do this& it will restore the photo to the original location. If you used Backup and Sync on your computer& it is still possible to delete photos from Google Drive. To do this& you need to open the Google Drive folder in your File Explorer. Select the photo that you want to delete. Once you delete it from here& it goes to the Trash folder. With this out of the way& let’s show you how to delete photos from Google Drive permanently.
Part 4: How to delete photos from Google Drive with Wondershare InClowdz
If all the methods we have explained earlier seem confusing or stressful& here’s a method that you’ll like. It is easy and straightforward. This method entails using a third-party software called Wondershare InClowdz.
With this software& you can manage cloud drives on a single platform. It also allows you to sync data across cloud drives and migrate data to different cloud drives. Here’s how to delete photos from Google Drive with Wondershare InClowdz in simple steps.
Migrate, Sync, Manage Clouds Files in One Place
- • Migrate cloud files such as photos, music, documents from one drive to another, like Dropbox to Google Drive.
- • Backup your music, photos, videos in one could drive to another to keep files safe.
- • Manage all cloud drives such as Google Drive, Dropbox, OneDrive, box, and Amazon S3 in one place.
- • Sync clouds files such as music, photos, videos, etc., from one cloud drive to another.
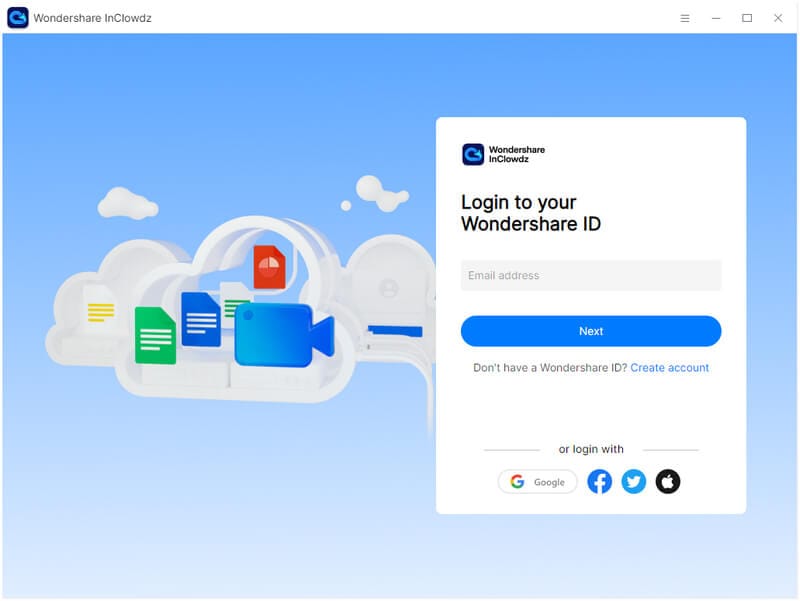
Step 1 – Download and install Wondershare InClowdz on your PC.
Step 2 – Create an account if you don’t have one then sign in. If you already have an account& you can sign in immediately.

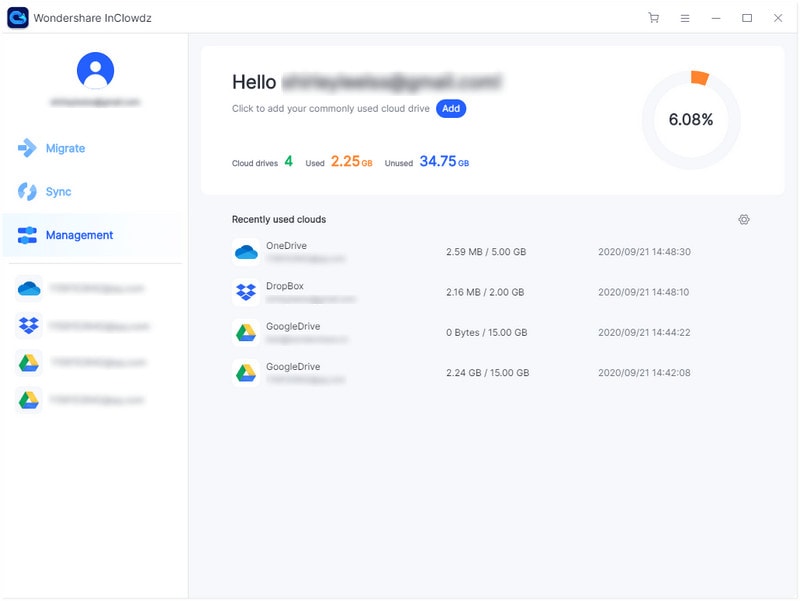
Step 3 – Click on Management on the left side of the homepage of Wondershare InClowdz. Select the cloud drive (Google Drive).

Step 4 – Follow the on-screen instructions to authorize the drive and when you are done& click “Authorize Now.”
Part 5: How do I permanently delete photos from Google Drive
It is one thing to delete photos from Google Drive& it is another to delete the photos permanently. When you delete photos or any other file from Google Drive& it goes to the trash folder. The photo remains here until you decide to either restore it or delete it permanently.
There are two ways to delete photos permanently from Google Drive on your computer. They are:
- Using web
- Using file explorer
We will explain both with the appropriate steps below.
Method 1 – Using Web
The process is pretty straightforward. It requires you to open Google Drive in your web browser. From here& you can then go to the photo on the homepage. Click on it to move it to the Trash folder before deleting it permanently. Let’s make it clearer by putting the process in steps.
Step 1 – Open Google Drive in your favorite web browser. Provide your login details if you are not already logged in.
Step 2 – Now go to the photo you want to delete. Click on it and go to the top-right of the window. You will see the Trash icon& click on this to move the photo to the Trash folder.

Step 3 – In the trash folder& right-click on the photo once again. This time& click on Delete Forever. With this action& the photo deletes from Google Drive permanently.
Method 2 – Using File Explorer
This method is also very easy. However& you can only use this method if you make use of the Backup and Sync app on your computer. Usually& when you use this app& you can see the Google Drive folder in your File Explorer.
Once you open this folder& you will see all the files in your Google Drive including the photo you want to delete. From here& you can delete the file permanently. Let’s break it down into steps for better understanding:
Step 1 – Open your File Explorer and go to the Google Drive folder.
Step 2 – Select the photo you want to delete.
Step 3 – Delete the photo.
Step 4 – Go to your trash folder on your computer.
Step 5 – Click on the photo here and delete it permanently.
Once you do& the photo is deleted permanently.
Conclusion
Now you know how to delete photos from Google Drive. Obviously& the process is not as difficult as you envisaged. We have shown you how to delete photos from Google Drive using your phone and on your computer. Finally& we showed you how to delete photos permanently.


 100% Secure