Using OneDrive from Microsoft comes with so many advantages. One such advantage is the ability to share OneDrive files or folders with others. This advantage helps to make you and your team members a lot more productive.
There are several methods of sharing files or folders on Onedrive. You can either do this via your PC or through the website. While sharing files with Onedrive& you also have the opportunity to determine what those individuals can do with the files.
In this post& we will show you all there is to know about Onedrive file sharing. Grab a seat and some coffee and let’s get down to business.
Table of Contents
Part 1: Can you share Onedrive files with external users?
Before you subscribe to a cloud storage platform& you want to know if you can share files with external users. This is a very important criterion considering that not everyone uses the same cloud storage platform. By external users& we mean individuals that aren’t subscribed to your cloud storage platform& in this case& Onedrive.
Here’s the good news. You can share OneDrive files with external subscribers. Okay& now that we have this sorted& the next question to answer is “How?”
The process isn’t so difficult. All you need to do is select the file in Onedrive and share it. Before you share& you’ll need to uncheck “Require sign-in.” Does this seem a little confusing? Not to worry& we will show you how to do this in this section by providing you steps to guide you.
Step 1 – The first step is to open Onedrive in your favorite web browser and log in. This takes you to the homepage of Onedrive.
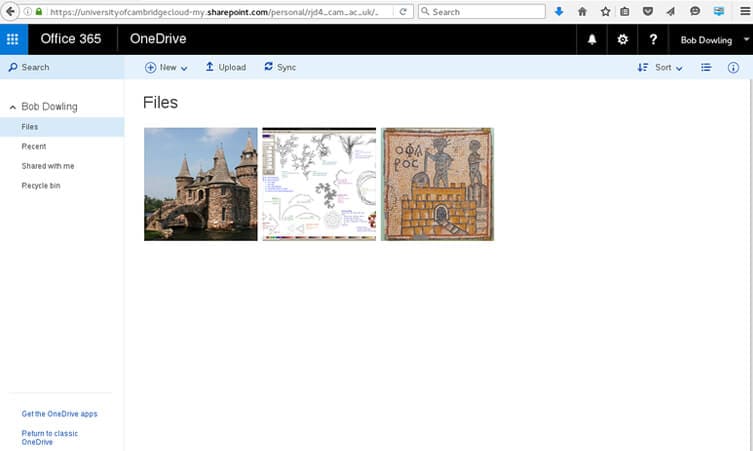
Step 2 – Click on Files and right-click on the exact file that you need to share. When you do& you will get a list of options. Click on Share (this is always the first option on the list).
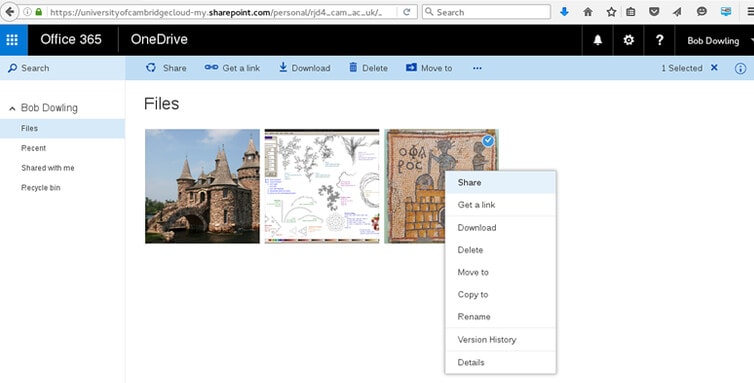
Step 3 – You will be presented with a pop-up dialogue box. Here& you will be deciding on the different options available. Provide the email address of the receiver. If you have sent a file or folder from Onedrive to this address& it fills in automatically. After providing the address& you will also see it in the menu& select it from here.
Step 4 – Onedrive will alert you that you are about to send a file to an external user. Going through with the process will mean that the individual will not be able to access the file. To provide access to the recipient of the file& you’ll have to uncheck “Require sign-in.”
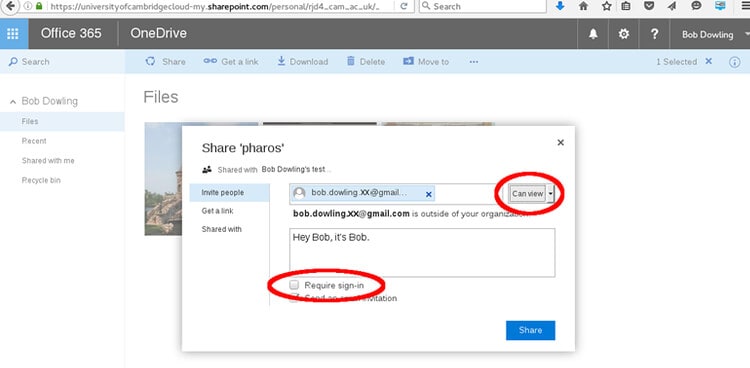
Step 5 – If you need them to only view the file& you can also click on Can Edit and change it to Can View. When you are done with this& click on Share.
Step 6 – You will return to your Files page where you will receive a confirmation message. This message will only show for a few seconds.
There you go& you have just shared a Onedrive file with an external user. The recipient will receive the file as a link in an email and will be required to download the file. That’s all about how to share Onedrive files with external users.
Part 2: How do I share files on Onedrive?
Now that it is possible to share files and folders from Onedrive with external users& let’s move on. Sharing files on Onedrive comes with so many advantages. For example& you can with several people on the same document. This way& each of you can contribute to the document which improves productivity.
While this is an interesting prospect& many people don’t have the slightest idea of how to share files using Onedrive. There are so many ways to share files and folders on Onedrive and they include:
- Copy and paste the link on a website or in a text message
- Sharing a link via email
We will explain both in this section.
Copy and paste the link on a website or in a text message
This method works well when you need to share documents with a large audience& especially people that you don’t know. A vivid example is sharing a file via Facebook& LinkedIn& or Twitter. The advantage of this is that recipients can either edit or view these files. It all depends on your permission option.
However& users that get the link will not be able to upload new items. Just like we described in the previous section& you can share this link with external users as well. Take the following steps to share the Onedrive file using the copy and paste link method.
Step 1 – Open your web browser and enter the Onedrive website. This takes you to the login page if you aren’t logged in automatically. In this case& you should provide your Microsoft account credentials.
Step 2 – Select the file or folder that you intend to share. To select& simply click on the circle that you see at the top corner of the file or folder. It is possible to share multiple items at the same time. Note that this option doesn’t work for school or work accounts.
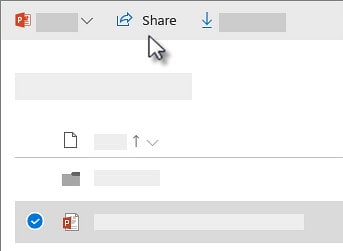
Step 3 – Go to the top of your window and click Share.
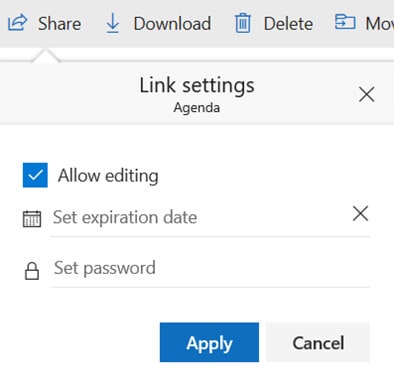
Step 4 – Customize your link options by clicking on “Anyone with the link can edit.” There are different options available& select the one you want and click Apply. Here’s a description of the different options:
- Allow editing – Choosing this option means that the recipients will be able to edit files. Also& they will have the ability to add files to a shared folder. The recipients can also share the link and change the permissions and the list of recipients.
- Set expiration date – This option makes the link valid for a specific period. After the expiry date& you’ll have to create another link to share with new users.
- Set password – In this case& the recipient will need to provide a password to gain access to the file. On your part& you’ll have to share the password with all the different recipients.
If you are using Onedrive for school or work& then you have additional options. These include:
- Anyone
- People in your company
- People having existing access
- Specific people
Step 5 – After choosing the share options& you’ll return to the Share box. From here& you can copy the share link to the clipboard.

Step 6 – Paste the link anywhere you want to and share it with the recipients.
Now you know how to share Onedrive link via the copy and paste method. Let’s show you how to share files with Onedrive via emails.
Sharing a link via email
You should use this option if you have the email addresses of those you want to share the files with. It is also helpful when you need to track all the recipients of the files. When you make use of this option& you will have the ability to remove permissions for certain recipients.
Take the following steps to share your Onedrive file or folder via email.
Step 1 – Right-click on the file or folder and select Share. From here& provide the email address or names of the recipients.
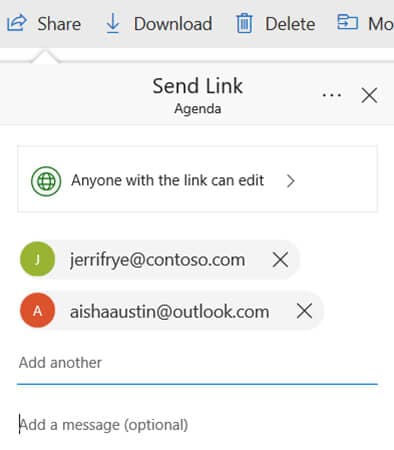
Step 2 – You can add an introductory note to your recipients. This step is optional.
Step 3 – Alter the permission levels by clicking on “Anyone with the link can edit.”
Step 4 – You can select your permission option here before clicking Apply. Just like in the method above& there are several permission options available. They are:
- Allow editing
- Set password
- Set expiration date
Using Onedrive for school or work gives you access to additional options. Asides from disabling the editing option& you can decide to prevent the recipients from being able to download the file. This being said& these are your additional options:
- Anyone (gives access to any individual to access the file).
- People in your workplace.
- Individuals having existing access.
- Specific people.
Note that Allow Editing is always turned on by default. You can also decide on allowing individuals to view files alone. We have described how to do this above.
Step 5 – After choosing the permission level& you can click on Send to share the Onedrive file.
Congratulations! You have learned how to share the OneDrive link via email. See that it is not as difficult as you thought.
Sharing Folders on Onedrive
People who receive your folders can also add the folder to their drive. This allows the recipients to place the folder among the other folders in their drive and also add contents. It also makes it easier for them to work on these folders offline. As you will expect& whatever updates they make to the folder& syncs so that all other recipients can see.
Part 3: Share Files from OneDrive to Google Drive/OneDrive/Dropbox
Nowadays& you may not only have one cloud drive. You sometimes need to share your files from one cloud drive to another. Wondershare InClowdz will be the best tool for you to easily transfer the files between different cloud drives.
Now here is how it works if you want to share Google Drive files to another Google Drive account or other cloud drives:
Migrate, Sync, Manage Clouds Files in One Place
- • Migrate cloud files such as photos, music, documents from one drive to another, like Dropbox to Google Drive.
- • Backup your music, photos, videos in one could drive to another to keep files safe.
- • Manage all cloud drives such as Google Drive, Dropbox, OneDrive, box, and Amazon S3 in one place.
- • Sync clouds files such as music, photos, videos, etc., from one cloud drive to another.
- First of all& download the cloud drive management tool.
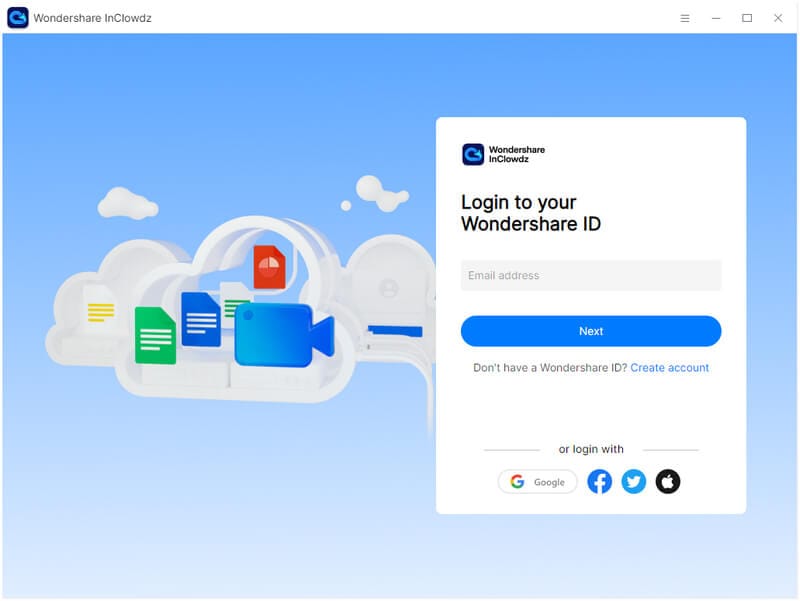
- Then launch the software and log in with a Wondershare account.
- Select the Migrate option from the left part. And add the OneDrive by click Add Cloud Drive.
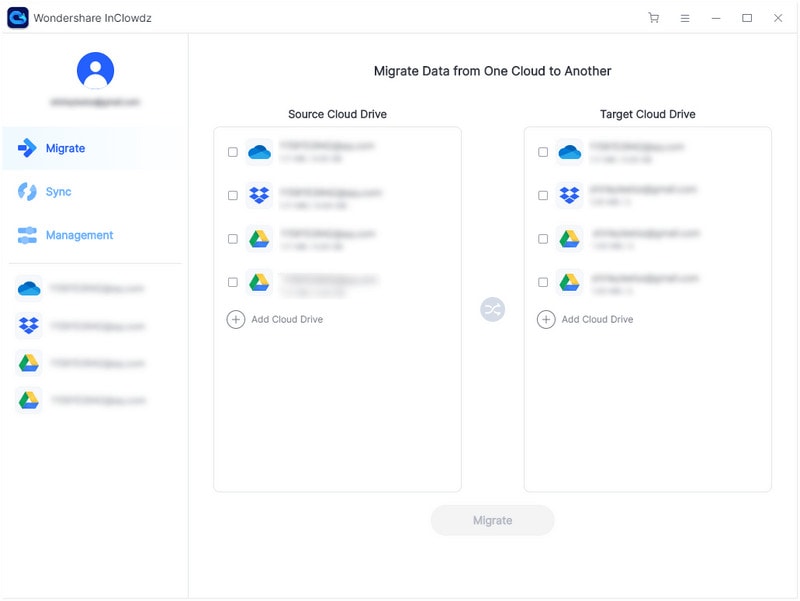
- In the Source Cloud Drive section& enter your OnDrive& open the desired folder and then select the files you want to share.
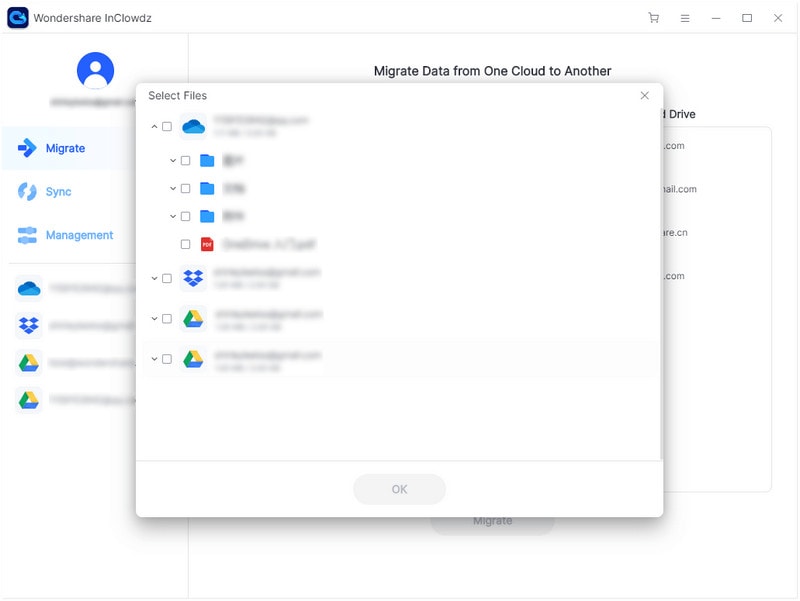
- In the Target Cloud Drive section& select a cloud drive (another OneDrive account or other drives) and then confirm the folder you want to place the to-be-shared files.
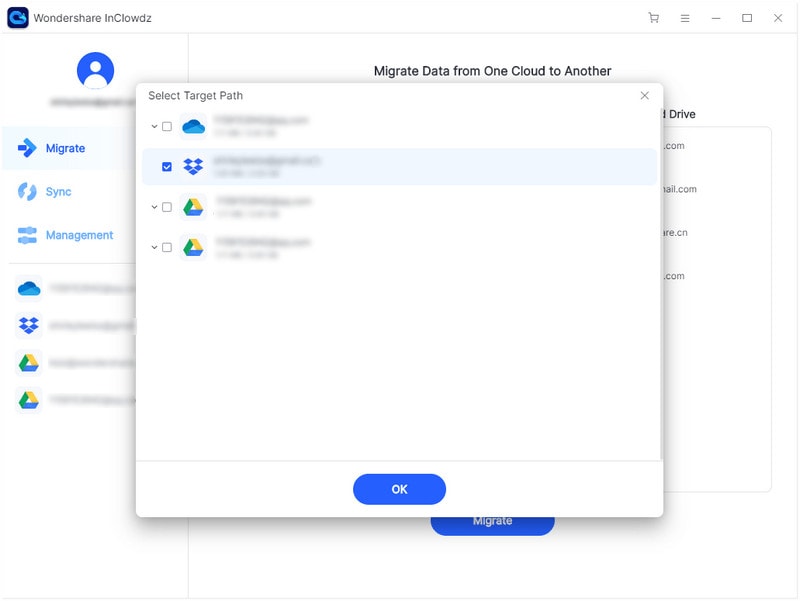
- After all the previous job is done& click on Migrate. Then all the selected OneDrive files can be shared successfully.
Conclusion
Now& you know how to share Onedrive files and folders. We have shown you how to share files with external users and different methods of sharing Onedrive links. If you have any questions& drop them in the comments section.


 100% Secure